Imagine turning a $30 investment into a thriving side business — or even a full-time income — all from your kitchen counter. That's the magic of melt and pour soap making. It's one of the most beginner-friendly crafts out there, and it also happens to be one of the most profitable.
Whether you're dreaming of an Etsy shop, eyeing that weekend farmers market booth, or just looking for a creative way to earn extra income, this guide walks you through everything. From choosing your first soap base to pricing your finished bars for profit, consider this your complete roadmap.
Why Melt & Pour Soap Is Perfect for Entrepreneurs
The handmade personal care market continues to boom. Consumers increasingly seek artisan, small-batch products with transparent ingredient lists — and handcrafted soap sits right at the center of that trend.
Melt and pour soap making is the most accessible entry point into this market. There's no lye handling required, startup costs are remarkably low, and your finished products are ready to sell in just a couple of hours — not weeks.
For small business owners, craft fair vendors, and online sellers, this translates to fast turnaround, low risk, and impressive profit margins. You can test new scents and designs quickly, respond to seasonal trends, and scale up without a massive upfront investment.
Melt & Pour vs. Cold Process: Which Method Is Right for You?
Before diving in, it helps to understand how melt and pour stacks up against cold process soap making. Here's a quick side-by-side comparison:
| Factor | Melt & Pour | Cold Process |
|---|---|---|
| Skill Level | Beginner | Intermediate–Advanced |
| Startup Cost | $30–$75 | $100–$250+ |
| Curing Time | 1–2 hours | 4–6 weeks |
| Lye Handling | None | Required |
| Customization | Moderate | High |
| Profit Margin Potential | Moderate–High | High |
The bottom line: If you want to start selling quickly with minimal risk, melt and pour is your best bet. You can always explore cold process later once you've built confidence and a customer base.
Essential Soap Making Supplies You'll Need
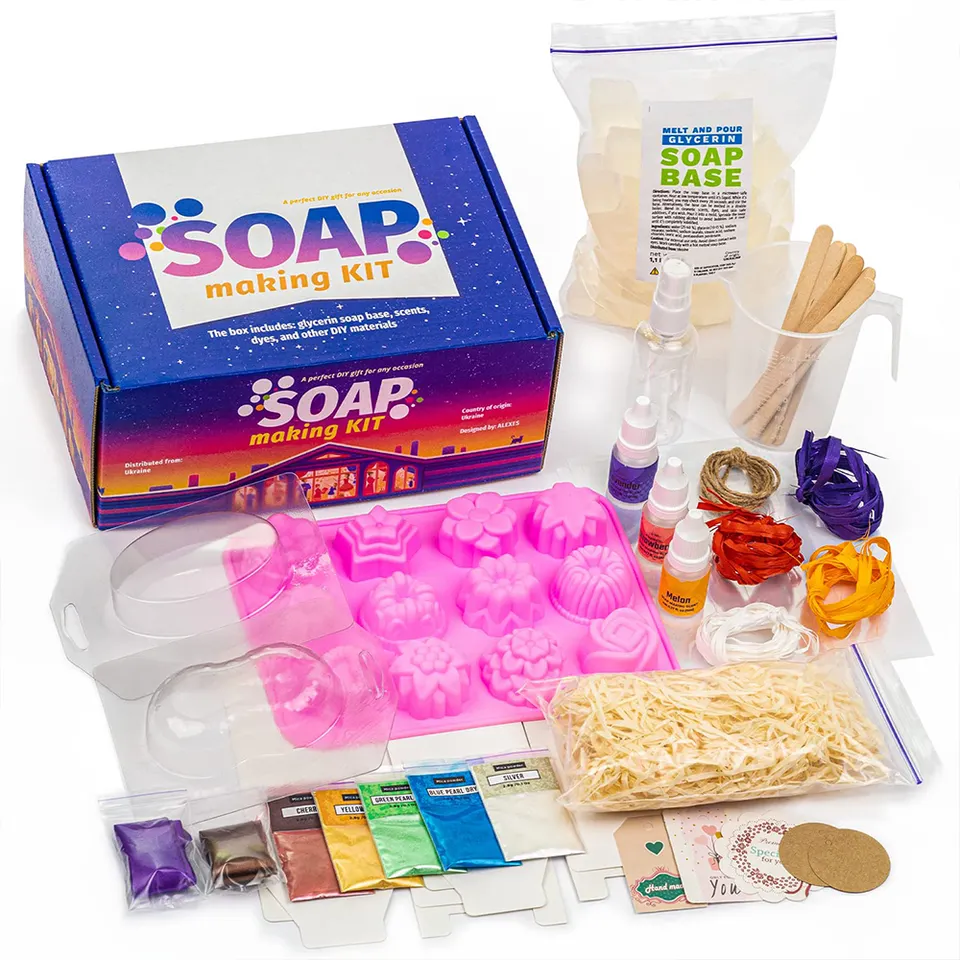
One of the best things about this craft is how little you need to get started. Most soap making supplies are affordable and easy to find online or at your local craft store. Here's what to gather before your first batch.
Choosing the Right Soap Base
Your soap base is the foundation of everything. It determines how your bar looks, feels, lathers, and performs on the skin. Think of it like choosing the right canvas before painting.
Here are the most popular options and how they compare:
| Soap Base | Transparency | Best For Skin Type | Lather Quality | Avg. Cost per lb |
|---|---|---|---|---|
| Clear Glycerin Soap | High | All skin types | Moderate | $3–$5 |
| White/Opaque Glycerin | None | All skin types | Moderate | $3–$5 |
| Shea Butter | None | Dry/Sensitive | Rich & Creamy | $4–$7 |
| Goat's Milk | None | Sensitive/Eczema-prone | Creamy | $5–$8 |
| Coconut Milk | None | Normal/Oily | Bubbly | $5–$7 |
| Honey | Semi-translucent | Dry/Mature | Moderate | $5–$8 |
Pro tip for entrepreneurs: Start with clear glycerin soap base. It's the most versatile, the most affordable, and it lets you create stunning transparent designs that photograph beautifully for online listings. Buy in bulk (10–25 lb blocks) to bring your per-unit cost down significantly.
Soap Molds: Shapes, Sizes, and Materials
Silicone soap molds are the gold standard for melt and pour. They're flexible, durable, easy to clean, and release bars without any fuss. Plastic molds work too but can be trickier to unmold.
When choosing shapes, think about what sells. Classic rectangular bars are always popular, but guest-sized rounds, heart shapes, and novelty designs (flowers, honeycomb, gemstones) command premium prices. You can find professional-grade molds on Amazon, Bramble Berry, or Wholesale Supplies Plus for $5–$20 each.
Additives, Colors, and Fragrances
This is where the fun — and the branding magic — happens.
Essential oils for soap are a top choice for scenting your bars naturally. Lavender, peppermint, tea tree, eucalyptus, and citrus blends are consistent bestsellers. Always check maximum usage rates — typically 2–3% of your total soap weight — to keep your products skin-safe.
Fragrance oils are another option. They're generally less expensive than essential oils, offer a wider variety of scents (think birthday cake or fresh linen), and tend to hold their scent longer. The trade-off is that they're synthetic, which matters to some customers.
For color, natural clays (kaolin, French green, rose), botanicals (turmeric, spirulina), and cosmetic-grade micas give you a gorgeous palette. Synthetic skin-safe dyes are also available for bolder, more vibrant hues.
Popular exfoliants and embeds include oatmeal, dried lavender buds, coffee grounds, poppy seeds, and loofah pieces. These add visual interest and functional benefits that justify higher price points.
Step-by-Step: How to Make Melt & Pour Soap
Alright — let's make some soap. Follow these five steps and you'll have beautiful, sellable bars in under two hours.
Step 1 — Prepare Your Workspace
Start with a clean, flat surface. Gather all of your soap making supplies before you begin — soap base, molds, fragrance, colorants, a heat-safe container, a spatula, and a digital thermometer.
Prep your soap molds by placing them on a level surface. Fill a spray bottle with 91% rubbing alcohol (isopropyl alcohol). You'll use this to eliminate surface bubbles. Trust me — this little bottle is your secret weapon.
Step 2 — Cut and Melt the Soap Base
Cut your soap base into uniform 1-inch cubes. Consistent sizing ensures even melting and prevents hot spots.
You have two melting options:
Microwave method (easiest): Place cubes in a microwave-safe glass measuring cup. Heat in 30-second intervals, stirring gently between each burst.
Double boiler method: Place cubes in a heat-safe bowl over a pot of simmering water. Stir occasionally until fully melted.
Target temperature: 120–140°F (49–60°C). Use your digital thermometer to check. Never let the base boil — overheating causes burning, discoloration, and a ruined batch.
Step 3 — Add Color, Fragrance, and Additives
Once your base is fully melted, remove it from the heat source. Let it cool slightly to around 130°F before adding your essential oils for soap or fragrance oils.
Recommended usage rate: 0.5–1 oz of fragrance per pound of soap base. Start on the lower end — you can always add more in your next batch.
Add colorants gradually. A tiny amount goes a long way, especially with micas and dyes. Stir gently and slowly to blend everything evenly without creating air bubbles.
Step 4 — Pour Into Soap Molds
Pour the melted soap slowly and steadily into your prepared molds, tilting the stream at a slight angle to minimize splashing and air pockets.
Immediately spritz the surface with rubbing alcohol. This pops any tiny bubbles and gives you a smooth, professional finish.
Want layered designs? Pour your first color and let it set for about 10 minutes. Lightly score the surface with a fork, spritz generously with alcohol (this helps layers bond), then pour your second color on top.
Step 5 — Cool, Unmold, and Cure
Let your bars cool at room temperature for 1–2 hours. If you're in a hurry, pop them in the fridge for 30–45 minutes.
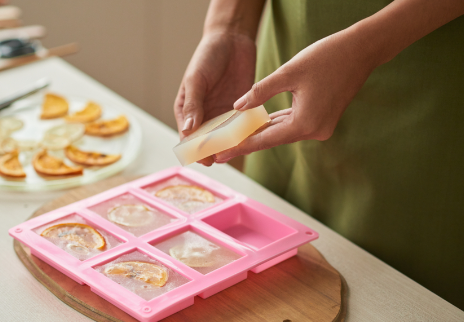
Once fully hardened, gently flex your silicone molds to release the bars. They should pop right out.
Important: Wrap your bars immediately in plastic wrap or shrink wrap. Glycerin soap is a natural humectant, which means it attracts moisture from the air. Unwrapped bars develop "glycerin dew" — harmless but unattractive beading on the surface that makes your product look less appealing.
Pro Tips for Professional-Quality Results
Avoid vigorous stirring. Gentle, slow stirring prevents air bubbles and that frustrating white "frosting" on the surface.
Invest in a digital thermometer. Consistent temperatures mean consistent results, batch after batch.
Embed objects for premium appeal. Small toys (for kids' soap), dried flowers, crystal-shaped embeds, or even gemstones create unique, giftable products that command higher prices.
Create swirl patterns. Pour two contrasting colors simultaneously from opposite sides of the mold for eye-catching marbled effects.
Always test small batches first. Before committing to 50 bars of a new scent or design, make 3–4 test bars. Check for scent retention, color stability, and overall appearance after 48 hours.
Packaging, Pricing, and Selling Your Soap
How to Package Melt & Pour Soap for Retail
Your packaging is your first impression. Popular options include shrink wrap bands with custom labels, kraft paper wraps with twine, clear boxes, and organza bags for gift sets.
Don't forget labeling requirements. The FDA classifies soap marketed with cosmetic claims (moisturizing, anti-aging, etc.) as a cosmetic product, which requires a full ingredients list, net weight, and your business name and address on the label.
Invest in cohesive branding — a memorable logo, consistent color palette, and professional-looking labels help you stand out at craft fairs and on online marketplaces.
Pricing Your Handmade Soap for Profit
Here's a realistic cost breakdown for a standard 4 oz bar:
| Expense | Estimated Cost |
|---|---|
| Soap Base | $0.75–$1.50 |
| Fragrance/Essential Oils | $0.30–$0.75 |
| Colorants/Additives | $0.10–$0.25 |
| Mold Depreciation | $0.05–$0.10 |
| Packaging & Label | $0.30–$0.60 |
| Total Cost per Bar | $1.50–$3.20 |
| Suggested Retail Price | $5.00–$10.00 |
A good rule of thumb: price your bars at 3× your total cost at minimum. This gives you room for wholesale accounts, market fees, and unexpected expenses while still maintaining healthy margins.
Specialty bars — think activated charcoal detox bars, botanical embed bars, or curated gift sets — can command $8–$12+ per bar. Don't undervalue your work.
Where to Sell Your Soap
Online: Etsy, Shopify, Amazon Handmade, and social media shops (Instagram, TikTok Shop)
In person: Local craft fairs, farmers markets, and boutique consignment arrangements
Wholesale & partnerships: Subscription box companies, corporate gifting programs, hotels, and spas
Start with one or two channels, master them, and expand from there. Many successful soap businesses began with a single farmers market table.
Common Mistakes to Avoid
Even experienced soap makers slip up sometimes. Here are the pitfalls to watch for:
Overheating the soap base. This causes burning, discoloration, and loss of lather quality. Stay below 140°F.
Adding too much fragrance. More isn't better. Excess fragrance can cause skin irritation and unsightly oil seeping on the bar's surface.
Not wrapping bars immediately. Glycerin dew (sweating) makes bars look wet and unappealing. Wrap within an hour of unmolding.
Using fresh fruit or perishable ingredients. Fresh strawberries in soap sounds lovely — until mold grows inside the bar two weeks later. Stick to dried botanicals and skin-safe additives.
Skipping test batches. Committing to 100 bars of an untested recipe is a recipe for wasted money. Always test first.
Frequently Asked Questions (FAQ)
Is melt & pour soap making safe for beginners?
Absolutely. Unlike cold process soap making, melt and pour requires zero lye handling, which eliminates the biggest safety concern. The process involves melting a pre-made soap base (similar to melting chocolate), adding your chosen scents and colors, and pouring into molds. It's safe enough to do with older children supervised, making it one of the most family-friendly crafting methods available.
How long does melt & pour soap last?
When properly wrapped in plastic or shrink wrap, melt and pour soap has a shelf life of 1–2 years. Over time, the fragrance may gradually fade, but the soap itself remains perfectly usable. Store bars in a cool, dry place away from direct sunlight for the best longevity.
Can I sell melt & pour soap legally?
Yes, you can. In the United States, soap that is marketed simply as "soap" (for cleansing purposes) falls under Consumer Product Safety Commission guidelines rather than FDA cosmetic regulations. However, if you make cosmetic claims like "moisturizing" or "anti-aging," your product is classified as a cosmetic and must comply with FDA labeling requirements. You'll also need a business license in most states and should strongly consider product liability insurance.
What are the best essential oils for soap making?
The top sellers consistently include lavender (calming, universally loved), peppermint (refreshing, energizing), tea tree (antimicrobial appeal), lemongrass (bright, clean scent), and eucalyptus (spa-like experience). Always follow IFRA (International Fragrance Association) guidelines for safe usage rates, which typically cap essential oils at 2–3% of your total soap weight.
Can I use food coloring in melt & pour soap?
It's not recommended. Food coloring can stain skin, bleed unpredictably in the soap, and fade quickly over time. Instead, use skin-safe colorants specifically designed for soap and cosmetics — cosmetic-grade micas, lab-certified FD&C dyes, or natural options like kaolin clay, activated charcoal, and turmeric powder. These provide vibrant, stable color without any risk to your customers.
How many bars can I make from one pound of soap base?
One pound of soap base yields approximately 3–4 standard bars at 4 oz each, depending on your mold size and how much you trim. For smaller guest-sized bars (2 oz), you can get 6–8 bars per pound. This makes it easy to calculate costs and plan your inventory.
Do I need insurance to sell handmade soap?
While not legally required in all areas, product liability insurance is strongly recommended for anyone selling handmade soap. It protects you if a customer has an allergic reaction or files a claim against your business. Policies for small soap businesses typically run $200–$500 per year through providers like the Handcrafted Soap & Cosmetic Guild or general small business insurers. Consider it a non-negotiable cost of doing business.
Your Next Step: Just Start
Here's the truth that experienced soap makers know: your first batch won't be perfect, and that's completely fine. The beauty of melt and pour soap making is that the learning curve is gentle, the materials are forgiving, and even your "mistakes" usually still make perfectly good soap.
Pick up a basic soap base, a silicone mold, and one or two fragrances you love. Make your first batch this weekend. By Sunday evening, you could be holding a beautiful, handmade bar of soap — and the beginning of your next business venture.